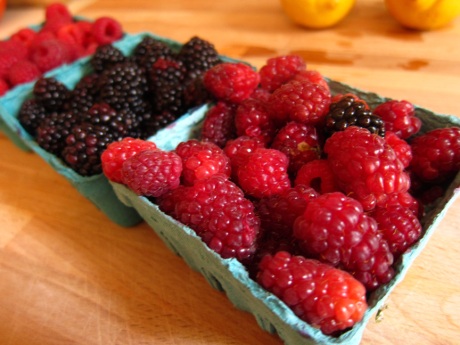
It’s been a while since I’ve posted anything. Sometimes life gets in the way of life. Between work and our own vacations, we had a string of out of town visitors back-to-back for about a month. And I didn’t get to the farmers market as much as I would have liked, and wasn’t able to carve much time out to do home-y things. So yesterday morning I went to the Ferry Plaza Farmers Market and probably went a little too crazy with the amount of stuff I got… But everything looked and smelled so amazing. Including these berries.

I combined a few recipes to make this one, but the topping part is mostly from my mom’s delicious Apple Crisp recipe. Cobblers and crisps are so ridiculously easy to make, kind of a pioneer-ish deconstructed pie, but they always taste phenomenal. And you could even use this recipe to make little mini cobblers in a few single-serving ramekin dishes if you wanted something really cute for your dinner table (or brunch for that matter).

Here’s what you need:
FILLING
3 pints of mixed berries (I used raspberries, blackberries and loganberries)
1/3 cup sugar (if you have really sweet berries, use less. or really tart berries, use a little more)
1 tbsp flour
1 tbsp cornstarch (optional, makes the filling a bit thicker)
juice of 1/2 a lemon
1 tsp lemon zest (1/2 a medium sized lemon will make the right amount)
pinch salt

TOPPING
2 cups flour
1 1/3 cups white sugar
1/3 cup brown sugar
1 tsp cinnamon
1 tsp baking powder
1 cup melted butter
1/2 tsp vanilla
dash salt

Preheat oven to 375°. Mix berries with sugar, flour, cornstarch, lemon juice and zest.
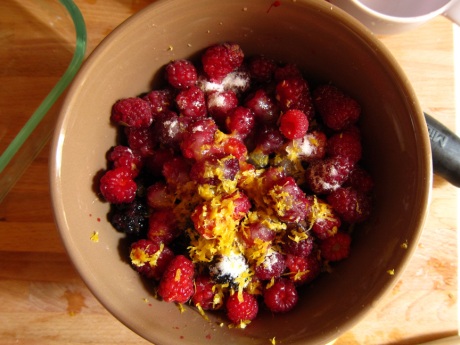

Make sure berries are coated. Put berry mixture in an 8×8 or 9×9 glass pan (no need to grease pan), distributing evenly.


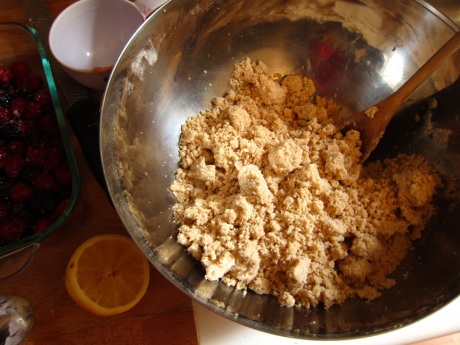
Mix dry ingredients of topping (flour, sugars, cinnamon, baking powder, salt) together. Then add the melted butter and vanilla. The mixture should form large sandy chunks and clumps.

Sprinkle topping onto the berry mixture in the pan.
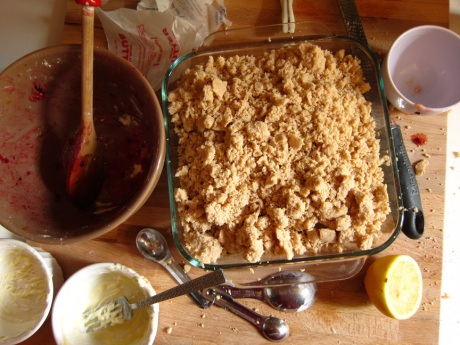

Bake for 45 minutes, until top is browned and your kitchen smells amazing.
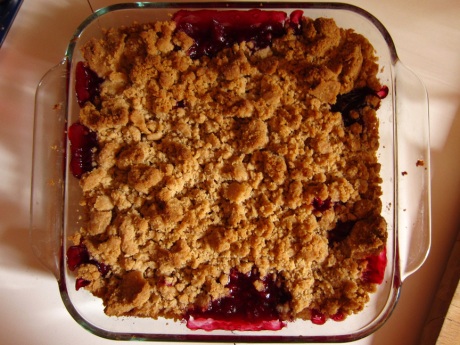

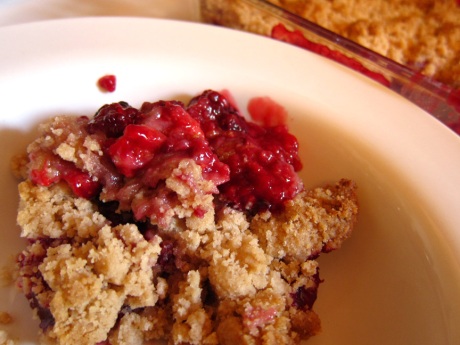
Let cool as long as you can stand it, and eat while it’s still warm. And add a scoop of vanilla ice cream for something really delectable.



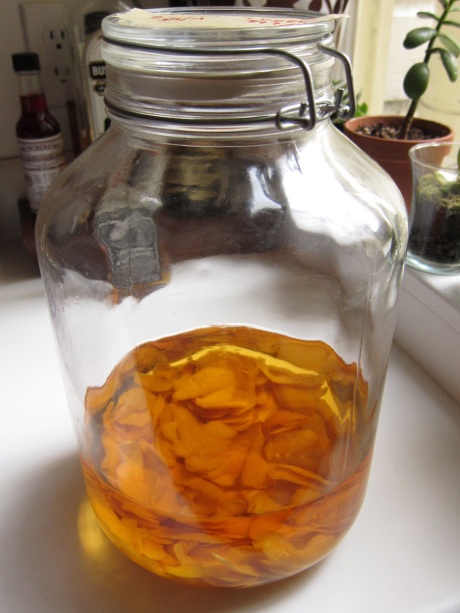
Six weeks ago I began the process of attempting to make my own limoncello. The lemon peels have been stewing in a noxious mixture of Everclear and vodka this entire time, waiting to be turned into something delectable.

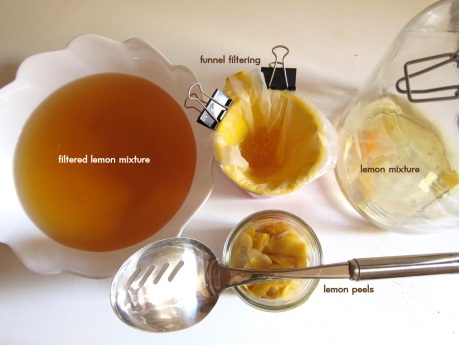
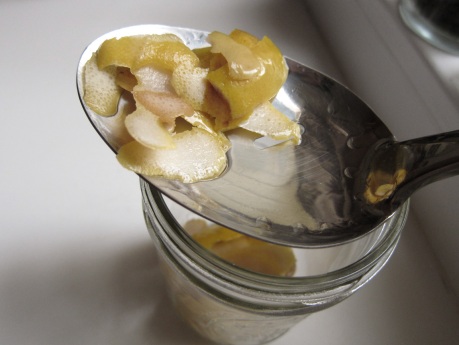
Still referring to this recipe, today I came much closer to having my very own bottled limoncello. First, I removed as many lemon peels as I could from the lemon/alcohol mixture with a slotted spoon.


I noticed the peels were quite pale and had lost a lot of their yellow color. Apparently this is both normal and good — the lemony color and essence had successfully transferred into the alcohol.
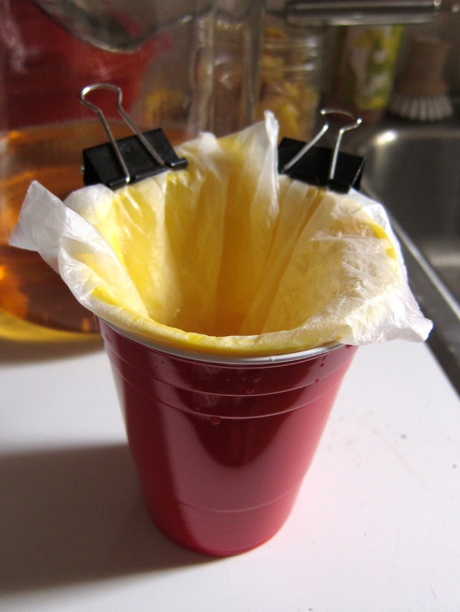
Then I poured the rest of the alcohol mixture through a wet coffee filter, to strain out the other particles and impurities. I had to attach the filter to the funnel with paper clamps, to keep the coffee filter from sliding down. (Later I realized I probably could have strained it through a french press coffee maker, making sure the french press was super clean so my limoncello wouldn’t tase like coffee.)


Then I poured each cup of filtered lemon alcohol into a bowl, on deck until I completed a simple syrup. (I used 4 cups of water, 4 cups of sugar, dissolved the sugar then brought to a boil, boiled for 7 minutes, removed it from heat and let it reach room temperature).
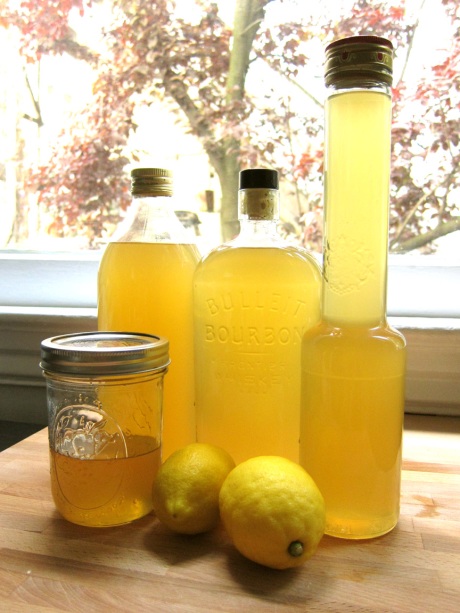
After mixing the simple syrup with the lemon alcohol, it was time to bottle. This recipe made way more than I’d expected so I had to scrounge for bottles and put some of it in a mason jar.


So… how did it taste? Well, according to the recipe I followed I still need to wait another week to let the sugar and lemons and alcohol work their magic, and in the meantime keep the bottles in the freezer. I did have a little taste on ice, and it was pretty good. And strong — I had less than a shot’s worth and determined that this stuff is definitely not just for the ladies. I’m hoping that in a week I’ll have something even more tasty. And maybe I can mix it with a little club soda, fresh lemon juice and fresh mint leaves? Mmmmm…

PS – I’ve been kind of overwhelmed that my bagel post has been on the WordPress Freshly Pressed front page for the last three days. Before this happened, I’d honestly never really even looked at that page and had never considered that a bunch of random people would read any of this. (Otherwise I would’ve written clearer instructions on how to make the bagels!) I started this blog mainly for myself, so I can look back and remember that I actually am accomplishing things in my new city, and to keep friends and family updated on what I’m doing. I’ve had almost 5,000 hits, 80 comments and over 100 likes on that post. Guess people really like bagels. (Well, yeah. That makes sense.) I’m sure most people who checked this blog out probably won’t keep reading, but for those that do, thanks!


I have a few projects going on around my house that I’ve been wanting to post about, but they’re not complete yet. And the limoncello won’t be ready until later this week. So, I’ll post about making bagels.
Yesterday, my friend Jess and I went to a bagel making workshop through Sour Flour. Turns out there’s a bunch of things about making bread and bagels that I didn’t know. At its basic level, bread making can be easy (obviously people have been doing it for centuries), but there’s a lot of nuances to learn once you get really into it.
In the class, we used a starter. I’d never used that before to make bread, always just packet yeast. I didn’t even really know what starter was. Basically, it’s just a goopy mixture of flour and water that you let sit at room temperature for a while — maybe a few days. The mixture then grows its own natural yeast that you use to start up your own bread. You “feed” it periodically by adding more flour or water, to help the yeast “grow”. I asked in the class if you could use beer instead of water in the starter — yes, you can. Your starter might grow differently, and your bread might taste a bit like the beer. I’ve made beer bread before, but that’s actually pretty different from this process.
Back to bagels. We mixed together (by hand) about 3 1/2 cups high-gluten flour (aka bread flour), 1tbsp salt, and about 2 cups of water. And a clumpy handful of starter. Then there was kneading, then resting, then stretching thin like pizza dough, then resting, then rolling into snakes and then rolling into little logs. Then forming into six bagel-like shapes.
I let the doughy bagel shapes proof overnight (aka rest), and woke up to find that they’d doubled in size. This is what they looked like this morning:

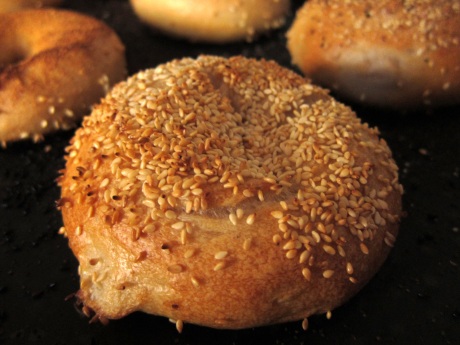
Then I boiled them for 3 minutes and added toppings (salt, pepper, garlic powder, sesame seeds).

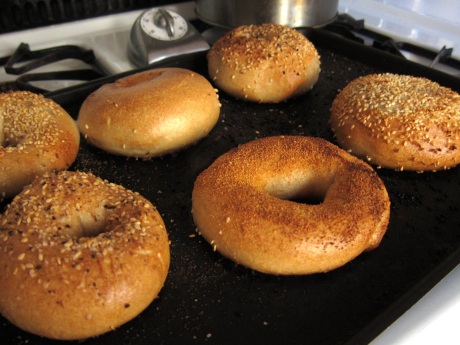
Then baked ’em. 15 minutes at approximately 475° (my oven has really funky temperatures, and no markings on the dial). I probably could have baked them just shy of the 15-minute mark. They weren’t burnt, but they were definitely toasty on the bottom.

I’ve come to the conclusion that making bagels isn’t really as difficult as I once thought, but it helps to kind of know what you’re doing. Splitting up the tasks made it seem like a lot less work — I liked making the dough the day before and popping them in the oven in the morning. And considering the fact that these are the best bagels I’ve had since leaving NYC, it’s probably worth it to attempt these again.


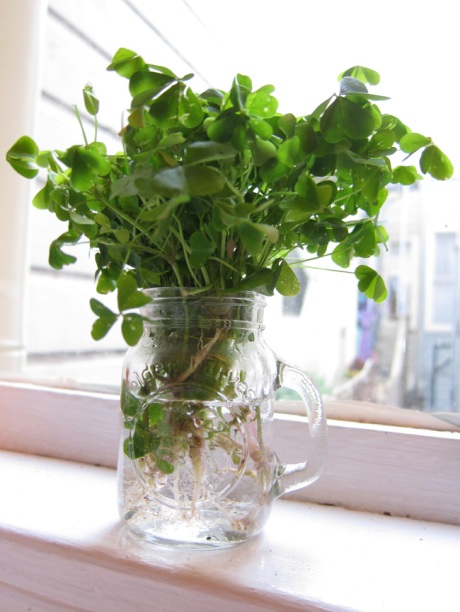
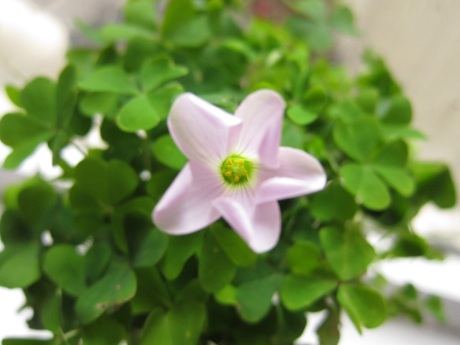
Yesterday I picked some green clover from the base of a tree in front of my apartment — in honor of St Pats, it seemed appropriate to put it in a miniature beer mug jar. I was going to cut it, but decided to keep the roots and see how long it lasts.

Then this morning, I noticed it had bloomed, one cute little purple flower.

I am not a cupcake maker. I am not a baker. And I don’t want to steal my cupcake blogging friend Jess‘s thunder.
But I’m Irish by heritage. And when I saw these cupcakes on Smitten Kitchen, I had to make them. And eat them.
Guinness cupcake with a chocolate whisky filling and an Irish Cream frosting. You can’t get much better than that. I think.
So I made them last night for my boyfriend and myself, and brought the remainder to work today. Hopefully I can make someone’s day. Because I know that every day around 3:30pm I wish someone had brought in some cupcakes. And now I can be that magical green glitter-covered hero.

I should add that I followed the Smitten Kitchen recipe exactly, but needed to double the frosting. And it still didn’t seem like enough, so I made an extra half portion of it. That’s also why I was only able to make pretty piped frosting on two of the cupcakes and had to spread the rest with a knife. But I’ve never made a buttercream frosting before, so I wasn’t really sure what kind of consistency I was looking for. And once I got to about 2 cups of powdered sugar, it seemed ready. I don’t know. But it tastes good. And the whole thing took me about three hours. How long are homemade cupcakes supposed to take? I’d venture to guess not usually three hours. But these are special filled cupcakes, and I’ve never made my own cupcakes before. So hopefully they get enjoyed today. Happy St Pat’s!

I signed up to take a calligraphy class way back in January. Just had the first one yesterday. I’m definitely not a master yet, can’t even make any full words, but hopefully I’ll make some progress over the next few weeks. One of the main things I’ve realized is that calligraphy is not a form of handwriting– it’s much more like drawing. You kind of have to unlearn how you actually write things, and then relearn how to draw each letter. And it’s time consuming. Our instructor, a master calligrapher, told us she can address about 10 envelopes per hour. Which isn’t very fast, but she’s been doing this for 23 years. So it’s a hobby you’ve got to have patience with. Still, I think it’s a gorgeous dying art and worth the effort. I can’t wait till I can write full phrases and create my own embellishments.

This weekend I caught a cold and couldn’t force myself to do much of anything yesterday except watch Alien and Aliens (today will be Alien 3 and Alien Resurrection). I have a ton of projects I wanted to get to, but they require more physical energy than I’ve got at the moment. So I decided to make vegetable stock and homemade croutons to not only make the kitchen smell nice but also make me feel like I’ve actually accomplished something this weekend. They’re two of the easiest and laziest things I know how to make. Besides microwaveable brownies.

How to make vegetable stock:
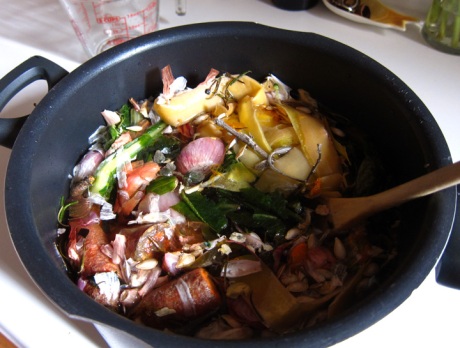
Step 1: Save vegetable scraps for a few weeks and store in the freezer until you’re ready to use them. My scrap pile included squash peels, squash seeds, scallion ends and skins, garlic nubs and skins, thyme, sage, oregano stems, carrots, kale stems, broccoli stems, sweet potato scraps, and I think even some ginger scraps.
Step 2: Dump your scraps into a pot and add about 2 quarts water for every 4 cups of vegetables. I dumped in the water first, then my bag of veggies. I also added half a dozen small peppercorns for flavor. It seemed like I needed more than 2 quarts of water for the amount of veggies I had, so I added an extra quart. In hindsight, this was a good idea because an entire quart of it ended up boiling down. (Leaving me with exactly 2 quarts).

Step 3: Bring the pot to a boil, then take down to a simmer for about an hour. Taste the stock while cooking to make sure it tastes ok (I’ve read warnings in other recipes that it can turn out bitter if you over-boil).
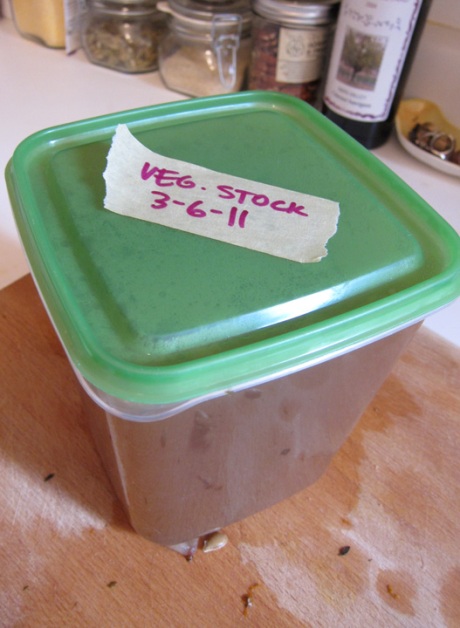
Step 4: Remove from heat and strain the stock out into whatever container you want to put the stock in. Mark it with a date so you can remember when you made it (and so it doesn’t sit unused in the fridge for too long). Now add it to soups, substitute it for cooking water for quinoa, rice or couscous. Or use it for whatever you want, really. And compost the boiled veggies afterward, if you can.

Now, let’s make croutons.
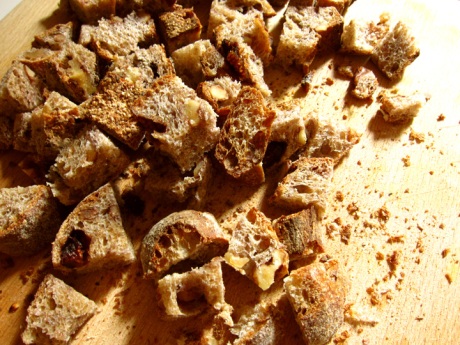
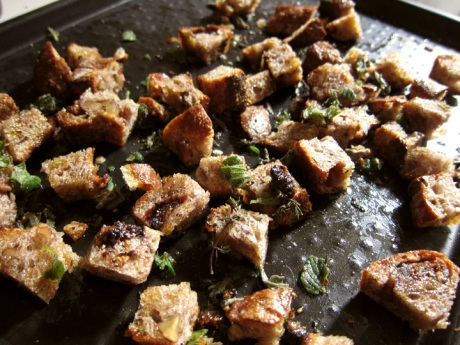
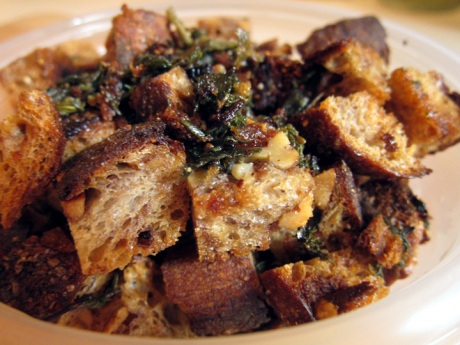
Step 1: Let some good farmers market bread go stale, ignore it for a week, or simply forget what the hell is in that brown bag on your counter. The bread will get hard, but make sure it’s not moldy. I used some pricey fig and walnut bread I bought at the Ferry Plaza Farmers Market last week, and didn’t want to feel guilty about throwing away the half of it I didn’t get around to eating (though it was awesome bread when it was fresh).
Step 2: Cut it into cubes. If you need to use a hacksaw, your bread is probably too stale to use at this point– compost it. If you can saw it with a bread knife, you’re still in the crouton zone.

Step 3: Toss onto a (preferably rimmed) baking sheet with salt, pepper, olive oil (or butter) and whatever fresh (or dried) herbs you have on hand. I happened to have some fresh thyme, sage and oregano.

Step 4: Bake at 350° – 400° (whatever you feel like, doesn’t matter all that much). Enjoy the smell wafting from your oven, and try to stir them at least once while cooking. Bake for 15-30 mins. This isn’t an exact science – baking time depends on whether you’ve preheated your oven, how fresh your bread is and how toasty you want your croutons. But don’t forget about them and let them burn! I’ve done this before and it’s a damn shame to have to throw out what would have been a delicious batch of croutons.
Step 5: Let cool and dump croutons into a container of your choice (Ziploc baggie, plastic container, mason jar, etc). They’ll stay good for quite a while, until they start to smell strange. Use as toppers for soups or salads.


My patio is coming together. I just got a couple of these fun macrame chairs off Craigslist. You can’t tell in this pic, but the darker yarn is purple. I love them. They’re so hideously perfect. Probably because I’m young (relatively speaking) and an urbanite, I had no idea that macrame lawn chairs were a thing. Seems like they hit their stride in the 70s/80s, and have dwindled a bit in recent years save for old lady diehards and people who like to make chairs for their favorite sports team. But I found some instructions and patterns online, and have also discovered that these types of chairs are “waterproof, sunproof” and will “last 20 years”. Awesome! Maybe I’ll attempt some more kitschy patterns and colors. Seems like a summer project and potential gift idea.

Everything from this morning’s breakfast came from either the Fillmore or the Ferry Plaza Farmers Market. (Clockwise, L-R): sweet potato hashed browns with thyme, mixed greens with fresh tangerine dressing, scrambled eggs (mostly whites) with thyme, toasted Della Fattoria fig and walnut bread with homemade honey butter.


I was able to snag some Meyer lemons at the farmers market last week, and needed to figure out what to do with them. Every food blog I’ve read says things like “you haven’t lived if you haven’t tried a Meyer lemon!” Ok, then. Time to start living. Martha-approved and gourmet chef lauded, they’re notoriously sweeter and supposedly more graceful on the palate than regular Eureka lemons. Making my own limoncello sounded far more interesting to me than making preserved lemons or a lemon pie. So here’s Part 1 of how I did it. Using this recipe as a base, I went to town.


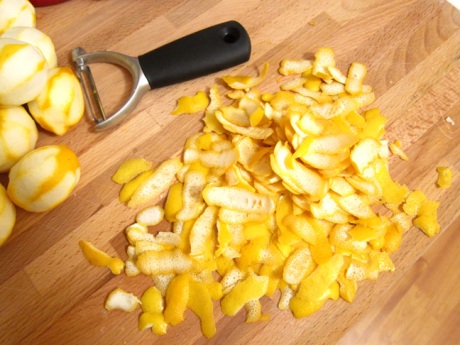
I used 18 Meyer lemons of varying size and freshness, a 750ml bottle of Everclear and about the same amount of Ketel One leftover from a party. The instructions say to scrub the lemons with a brush and some vegetable wash; but not wanting to buy any I forged my own from a little baking soda and vinegar. Did it work? I really have no idea – the lemons seemed clean enough to me. After cleaning the lemons, then came the peeling.


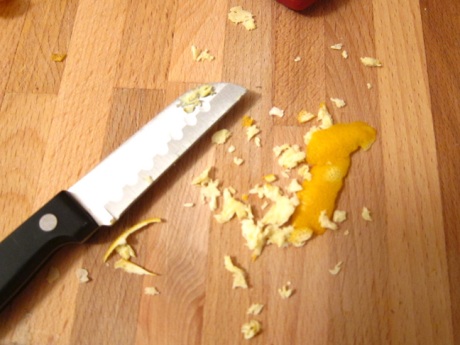
I found that the firmer and larger the lemon, the easier to peel while getting minimal pith (the white stuff on the underside of the peel). I used two types of peelers – one horizontal one (pictured) and another vertical one. The horizontal peeler for some reason seemed to get less pith, but really only worked well on the larger firmer lemons. Limoncello diehards are super anti-pith — apparently the world will end if any bit of pith lands in your precious limoncello nectar. But to me, there’s just no way to use a regular veggie peeler and get pith-less peel. Just. Not. Happening. So, because I had some time on my hands I decided to do a little pith scraping with the back of a knife. Will it be keep the bitterness out of my limoncello? I have no idea. I wasn’t able to really scrape off that much, either. And it probably added an extra 10 minutes to the 30 minutes total it took me to make all the peels.


So then I dumped the pith-scraped peels into a giant jar along with the Ketel and Everclear. Smells like rubbing alcohol now, but hopefully in a few weeks everything will come together.


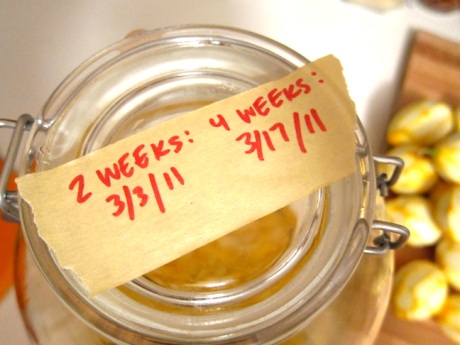
I marked the top of the jar with a 2-week and a 4-week mark, so I can tell when to stir it, when to remove the peels and complete the process. In about a month, I’ll post Part 2. (Update: Check out Part 2 here!)